Setting up OpenGL with VS2013 is always a hassle. But after looking at some tutorials here and there, putting things in system folders and copying dlls in output folders for each configuration I decided to find out if I could do something that felt a bit less of a cheap and dirty way and that would use dlls and libs etc only on my project without adding more clutter to the already crowded system32 and windows kits folders. This is a quirk of mine and I want to do things on a per-project basis so if you’d like that here’s a tutorial.
Note
Sometimes you may notice the project name changes. Don’t be alarmed, I just created a new temp solution to be able to create the screenshots without messing with my working solution. Also most of the changes are taken from here.
Following up on my thoughts for making this an easier way to setup I’ve stumbled on Property Sheets. Apparently after the upgrade from VS2008 to VS2010 , MS stopped using environment variables and approached the problem differently. They started using xml schemes for setting up project properties. I won’t go into it too much because there’s a ton of info into how a .vcxproj and a .sln file is structured so I’ll leave it to you to look through it. There’s a section at the end for those interested.
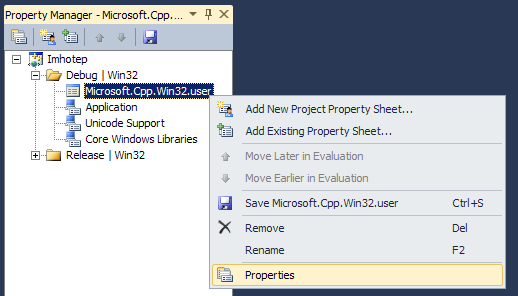
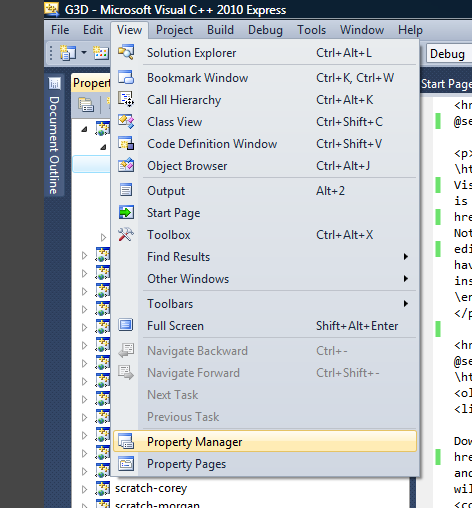
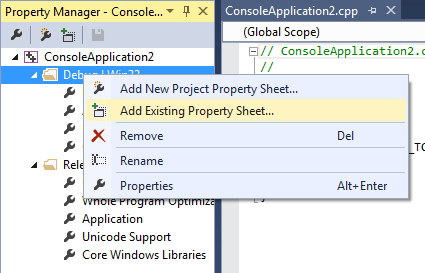
Property Sheets are basically xml files that contain just those changes you’d like to see in the Properties of a project. Property Sheets inherit from each other and the factor deciding who inherits from whom is the order with which they are included in the project. To inspect that open the Property Manager(View->Other Windows->Property Manager) and you’ll see the following window:
freeGLUT and GLEW folders inside the Dependency folder
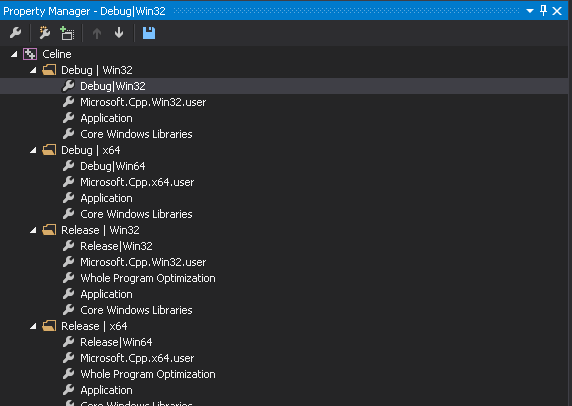
As you can see the example image contains a project called Imhotep with just the two regular configurations for the Win32 Platform. The selected sheet will inherit from the one under it and so on. The final collection of properties our project will use on each configuration and platform is the result of the bottom-up evaluation of the sheets involved. In this case the last to be evaluated is Microsoft. Cpp. Win32.user. So any changes in the files higher will overshadow the property values of the ones lower.
There’s only one exception to the properties we can change using custom sheets, like the Platform Toolset and everything under the Project Defaults category in the General Property Page, the reason being they are handled in a previous step of the whole evaluation in order to include some other System or MS-provided Property Sheets which the resulting Configuration Properties will inherit from(one such example is the Unicode Support sheet which is included using the Character Set property). So just those properties, you will have to set manually in the Project Properties.
1) Download the binary version of `FreeGLUT` from this [website](http://www.transmissionzero.co.uk/software/freeglut-devel/), make sure the version you get it `2.6.0 or higher`.

2) Download the latest binary version of `GLEW` from their [site](http://glew.sourceforge.net/), make sure to download the one labeled `Windows 32-bit`.

3) Download this [Build Files archive](https://drive.google.com/file/d/1UkZI_aQ5fB1DHXn810sE0lbuIh5QcIjp/view?usp=sharing) containing the sheets we mentioned above along with a batch file which we'll explain later.
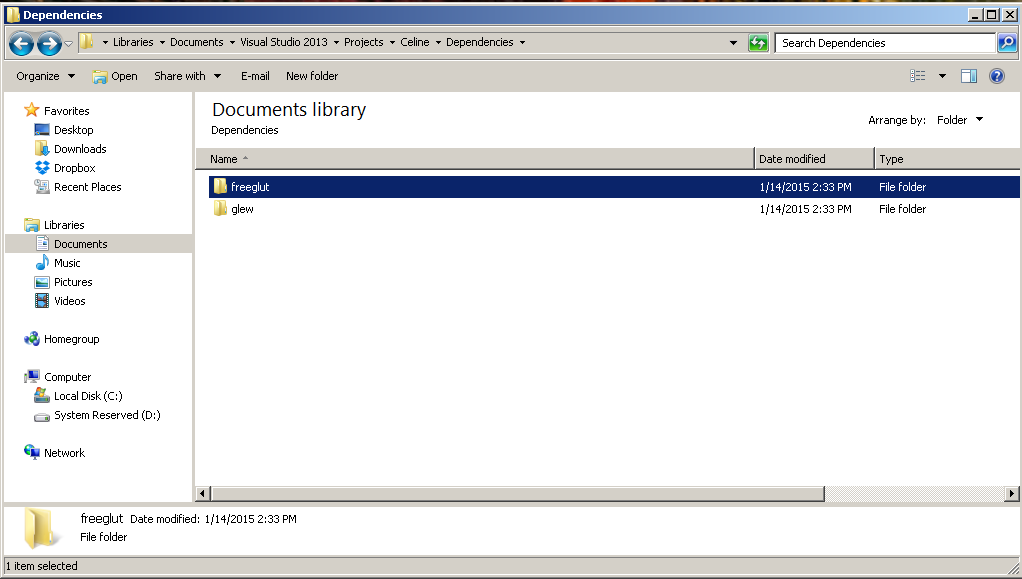
Step 2: Create a Dependencies Folder and extract libraries there
Go to the solution folder and create a Dependencies folder.
Extract both freeglut and glew in the Dependencies folder:
freeGLUT and GLEW folders inside the Dependency folder
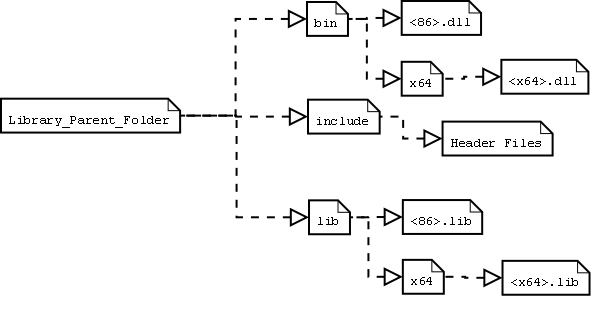
Seeing as they have some differences in their folder hierarchy I like to go in and make all of them uniform like so:
Step 3: Extract BuildFiles.zip in the Solution folder
The archive already contains the Build Files folder so just extract it in the Solution folder.
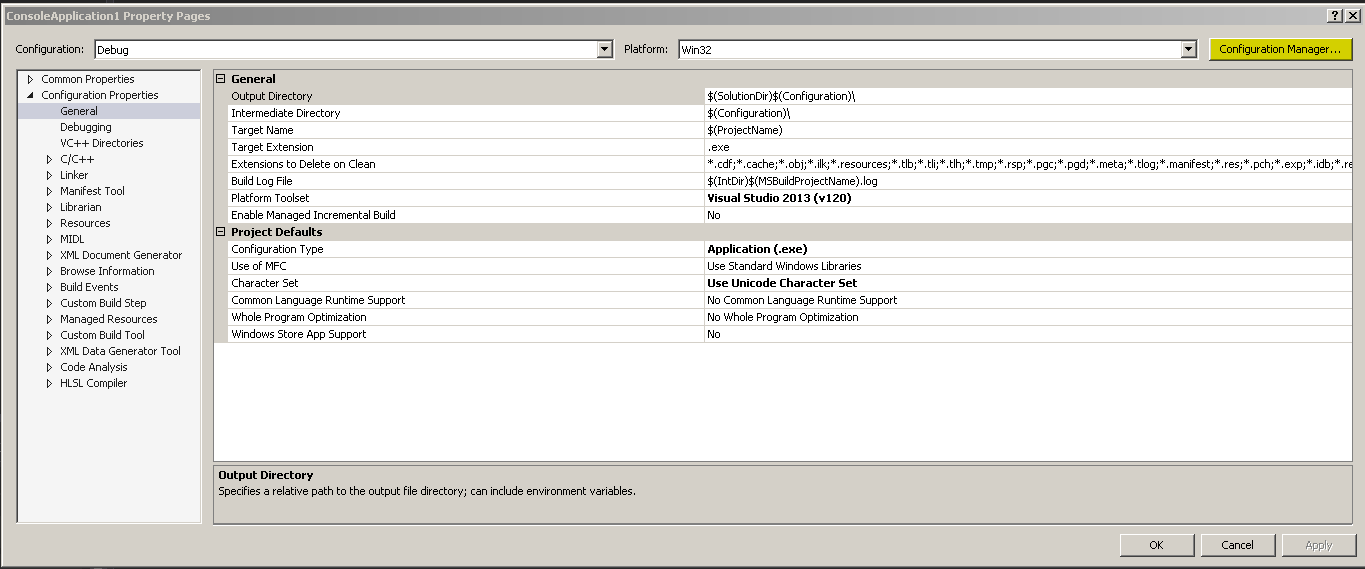
Step 4: Set up Project Properties (Compiler)
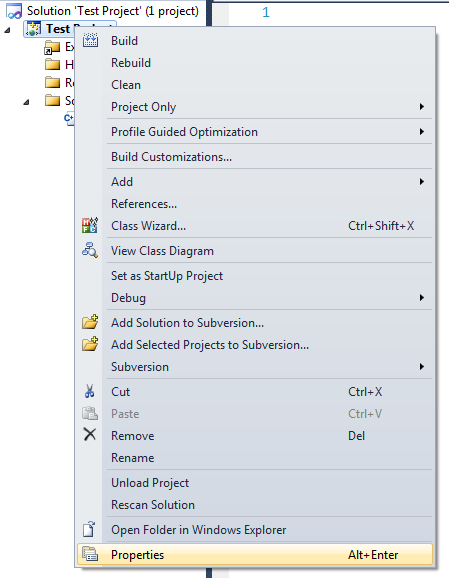
Right click on your project in the solution explorer again, and click on Properties in the context menu:
Make sure that before setting any settings to set the Configuration drop-down to All Configurations:
The first change we’re going to make is in the General property page under the Configuration Properties heading. in the property page, change the Character Set option under Project Defaults to Not Set (see highlighted screenshot):
Note
You’ll notice now in the Property Manager that the Unicode Support sheet is no longer in there. When the .vcxproj file is read there’s a line near the beginning where a sheet called Microsoft. Cpp.default.props is imported to the project. From the Visual Studio Blog:
“This property sheet contains the default settings for a VC++ project. It contains definitions of all the project settings such as Platform, PlatformToolset, OutputPath, TargetName, UseOfAtl, etc. and also all the item definition group defaults for each known item group. In general, properties in this file are not tool-specific.”
Step 5: Set up Configurations and Platforms
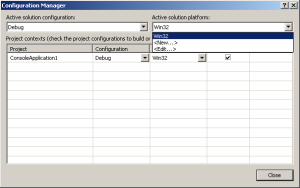
Ideally we want two different configurations(Debug, Release) in each of two different platforms(Win32, x64). We can always set up more configurations but for the sake of brevity I’ll deal with just these. So for starters open up the Configuration Manager.
Right click on your project in the solution explorer again, and click on Properties in the context menu:
As soon as the Property Pages are displayed , click on Configuration Manager on the upper right.
Click on the Active solution platform and then click on New.
Select x64 as the new platform and keep Copy settings from to Win32 and the Create new project platforms checked, then click OK.
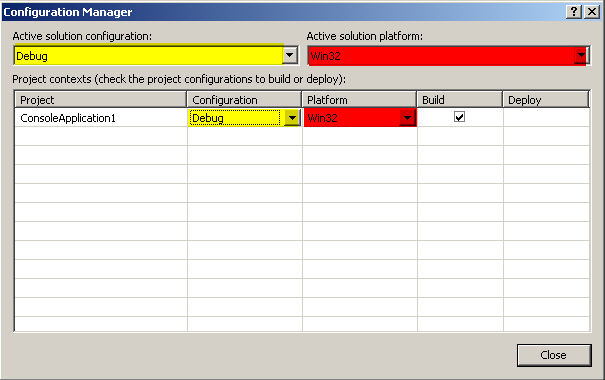
While at the Configuration Manager, click on the first Configuration cell and then click on New.
Repeat 4
Now make sure for each combination of Active solution configuration and Active solution platform that you have the same configuration and platform selected in the Project Contexts’ equivalent cells. Finally, click on Close.
Note
In case someone is wondering, the difference between the top options and those of the table below is that the top two are about the solution while the table is about the projects inside the solution. A solution can have multiple projects inside(some of those are libraries, others are about editors and tools etc.). Having a solution at Debug, doesn’t mean that all projects have to be set to the Debug configuration and that goes for the platform as well. I.e in case we have a subproject for the Editor that is stable in it’s Release configuration and the purpose of this build is to test the subproject that has to do with the Game then we can set the Editor project to Release while keeping the Game project at Debug. Or we might have written the code for the Editor in Win32 because it’s not worth it to optimize the Editor for 64bits, whereas the Game is a must. For now lets use the simple case of having just one subproject to the solution and having it match the solution’s configuration and platform in each combination.
Step 6: Property Manager
Open up the Property Manager(View->Other Windows->Property Manager)
Right click on each folder and select Add Existing Property Sheet....
Navigate in the file browser to <Solution Folder>\Build Files\Property Sheets\ and select the file corresponding to the folder you tried to add the sheet to. So if you right clicked the Debug|Win32 you’ll choose Debug_Win32.props and so on. In the end you’ll get
For those who want to know what the batch file does and how it’s set up, I refer you to Build Events and specifically the Post-Build event.
Also for those interested, one can definitely inject xml content into the .vcxproj and the .props file to do all kinds of things like programmatically inject new configurations or platforms(for these two its better to update the .sln file programmatically as well), or create Property Sheets programmatically and have them being imported under the appropriate <Configuration> | <Platform> tag inside the .vcxproj and so on. One disadvantage of this way is that it needs to be done outside VS because VS can’t load the xml changes while the project files are “in use”. For those who’d like to delve deeper here’s a very useful link for their structure.
As alternatives go, there’s also the option of writing code in C++ or .NET in order to use the VSProjectEngine API that MS has exposed to us. See MSDN for detailed info into the API. It would make a fun project to try and create either a custom New Project Wizard as a VS extension that runs using that API or maybe a custom menu that has various little utility extensions that can do that.
In the end I think that Property Sheets and the batch file are a very good and easy way to go. Not a lot of fuss and settings and the sheets have been set up so they can work in any project provided you have the Dependencies and Build Files folders present in the Solution folder.